Showing posts with label creating. Show all posts

Saturday, October 20, 2012

day 20: know God {a printable}

Eleven years ago today, before I had fully let Him into my heart, God began teaching me the made-for-each-other kind of love.

Six years ago today, He grew my mother-heart and my knowing of Him as a loving parent when we welcomed our third child, Luke, into our family.

Luke @ a couple months old - the date stamp lies

Today, I'm still learning about His love and how to love Him back with a I-can't-get-enough-of-You kind of love, and not a love that is based out of obligation or fear of making Him mad at me. Believe me, I have a looong way to go in learning this love lesson.

And because I can't of a more clever way of linking those above paragraphs with this next bit (I'm all focused on celebrating an anniversary and a birthday on the same day!), I'll just throw it out there.

It's this:


A printable to sum up the loving God theme for this week. Because I want to know Him so fully that it leaves no room for knowing anything else. The picture is from here. The words I added. And you may print it for your personal use from my Scribd page. (It printed a little darker than it appears on my screen.)  

FYI...the whole loving my enemy thing was a total fail this week. I got about as far as this and then have stayed there this week, learning to love the unlovely moments. But then, if I could learn to love that well in just one week, much less 31 Days, I imagine pride would rear it's ugly head and tell me I was amazing. Which is a total like. Because only He is.

(View all the 31 Days of Deep Love Diving posts here )

This week I'm learning to love God with all my mind and loving my enemy (a.k.a. the people I'd rather not have to deal with). Want to join me? Please click here for this week's challenges.


*Images for the Deep Love Diving banners and buttons were courtesy of this site.

Wednesday, August 29, 2012

when you want to give a gift that never wears out


Ever since our children starting receiving party invitations, I’ve perched on a mental teeter-totter. It’s a gift giving one. To gift stuff. Teeter. Or not to gift stuff. Totter.

With every invite I agonized over the desire to provide a “cool” meaningful gift versus following my conviction that I was contributing to our culture of excess. Up until this year I leaned heavily to the teeter side. And then God stepped in with an answer...
image credit
Please join me over at Amy Sullivan's today for the rest of this story. She graciously invited me to write a guest post on gifting experiences after I commented on this post she wrote.

And, if you've never met Amy before, stay awhile and click around her blog. She has a big heart for others and her posts inspire the servant heart to shine.

Saturday, June 23, 2012

pinwheels

I'm currently in the midst a creative growth spurt. It can be a good thing and a overwhelm-your-life kind of thing, especially when I add more "to do's" to an already full plate. :) It's a delicate balance, but I also need to acknowledge that our Creator put His creativity in me, so sometimes, I just have to run with it.

My latest project? These:


And I just listed them in my shop. Splashes of summer in a scrapbook or on a handmade card? Yes, please. :)

(P.S. I love picmonkey's collage feature...can you tell?)

Friday, June 22, 2012

summer in a jar: upcyclers creativity challenge

Ever since I joined the Upcyclers Team on etsy, I've enjoyed the ways their engage their members in fun ways. Like the monthly Team challenges. And their blog.

Then, in May, they began a team creativity challenge where interested members could come up with upcycled ideas for a common upcycled medium. I was hard pressed to come up with any upcycling ideas for the first object - a stereo or something that makes sound/music.

But June's challenge was something to get excited about: an empty jar.

I don't know why that is exciting. It may be weird to get a thrill at the sight of pristine glass with unadorned metal lid. But I do. Maybe it's the frugal environmentalist in me. Or perhaps the desire to find God's gifts in the simple.

But I digress.

Back to the challenge.

Upcycling an empty jar isn't new for me. I've put them to good use in the kitchen and in my sewing room. See? 


But I don't think those ideas would knock the socks off of anyone, so on went my thinking cap. And here is the fruit of my brainstorm.

Introducing the...


It's summer and fireflies* and childhood and upcycling in one tidy package.

And the best part? I didn't spend a penny.

Here's a brief look at how I did it:
  • I converted the lid ring of the jar into a firefly net. All it took was some crinoline (any type of netting would work), wire, nut, fabric, glue and a wooden dowel.
  • I added some extra netting and elastic band in the jar (to keep your first catch of fireflies contained while you capture some more)
  • Add the tag with some hemp twine for look and to keep the wooden dowel with the jar
And that's it!

*No fireflies were harmed in the production of this jar. If you make one like it, please be sure to release your winged lights at evening's end. They'll thank you for it. :)

Saturday, February 11, 2012

banded in love

Yesterday, my parents embarked on another mission trip to the Dominican Republic toting these with them:

Twenty-eight reversible headbands to hand to girls in the community where the mission team is working to build a kitchen for the Lighthouse Community School. Each headband represents a purchase from my shop and this is my thank you to you who have done so. :)

And, if you want to try some Dominican-style cooking, here's a casserole recipe my mom brought back with her...it's one of our favorites.

Wednesday, February 8, 2012

valentine's day: "cards" for school friends

I'm always faced with a dilemma around every card-giving season - do I spend money on something that most likely will be tossed in the very near future or do I find another way to express the sentiments fitting for the occasion? The alternative way most often wins out. Probably because I tend to toss most cards rather than keep them. Though I'm trying to find ways to amend that. But images of our children sifting through mountains of paper after we've dearly departed and wondering, "Why did she keep that?" float through my head.

Knowing Reese's class would be passing out Valentine's next week again posed this dilemma: Do I buy the box of Valentine's for him to sign or do I think of something more useful, practical and less wasteful of paper? The practical side again won out and here's the result of my brainstorm:


Because, who doesn't love new crayons? (or in this case, just one.)

Here's what you do:
1. Buy some crayons (one for each of your child's friends)

2. Download this page from my scribd account and print it out. There are 16 tags on one page. If you're really frugal and eco-conscious, conceivably, you could print this on the blank side of a pre-used page. Just make sure it's wrinkle free and free of sensitive information. (Note: for some reason, the font looks different on the scribd screen than in the original PDF. When I downloaded it from Scribd, however, the text appeared the same as my original copy.)

3. Cut out the tags. I used a paper cutter, but scissors work too.

4. Using a glue stick, apply glue down the length of the blank side of the tag. I had Reese do some, but in the interest of glue conservation, did most of this myself. ;)

5. Bring the ends of the tag together, aligning them and then press to seal the paper. Be sure to leave a loop opening big enough for the crayon to go through. Depending on your child's age, they may be able to do this part themselves. I needed to help Reese.

6. Have your child select a crayon (Reese loved this part!) and insert it into the loop. Then press to seal.

7. Once the glue dries, your child can sign their name on after the "xo" portion of the tag.

And here's what it looks like on each side:


sharing with:
kojodesigns

Saturday, February 4, 2012

100th day...now

This week the kids reach their 100th day of school. Dave though that went by fast. ;)

And through these weeks, I continue to count the gifts of knowing this is where God would have them, in spite of my feelings and fears. The gifts of:
  • Brianna and Reese consistently saying they had a good day at school
  • giving them the choice whether or not they want to do their homework/study we strongly suggest it, but they get to make the choice - something I could never have done while homeschool, tempting though the thought
  • their teachers choosing that profession - especially when that profession means they must bravely enter a classroom of coughing, sneezing, runny-nosed children
  • crossing guards who look out for other people's safety
  • the bookends of walking to school most days in spite of the struggles to do so
  • resting in the framework the school routine provides - a framework not of my creating
This isn't to say I may enter into serious doubts about this choice when we face difficult challenges which may come with a public school system, which is why I must record this now. The trusting that God spoke clearly in want them here, now. Maybe not forever, but for now, yes.

And here's the way I helped Reese mark this 100th day of school:


I gave him some suggestions and this Lego theme is what he chose. Lego seems to be a theme lately. I provided the art direction, but he gathered the Lego, set up the men, helped take the pictures and had to check and recheck our count was correct. (We cut and pasted the pictures into Publisher after Pickniking them and printed this on a standard letter-sized paper - the back of a school paper, in fact. I love recycling.)

Friday, February 3, 2012

SweetHeart Love on a String Tutorial

A couple of weeks ago I was contacted by a writer of Sustainablog to do a tutorial for Valentine's Day. As God would have it ;) I had just put a little something together as an extra gift for customers at my shop in mid-January to mid-February featuring upcycled fabric scraps.

I hope you will join me over here, for the tutorial.

Tuesday, January 24, 2012

crafting love: Valentine's Day idea #1

I originally posted about this idea last year, but am refreshing it for Valentine's Day. (I need to give credit to Tee from Sustainablog for reminding me of this tutorial and suggesting it be used for Valentine's Day - thanks Tee!). I've created a link at the top of the blog for the Valentine's Day ideas I'll be sharing over the next couple of week. Or you can access it, by clicking here.


Because I'm usually opt to toss rather than keep for nostalgia's sake, I have very few cards on hand, except a large stack from our wedding which I dug into for this tutorial. Which come to think of it, does go with the love theme. ;) But I much prefer to re-purpose items where possible, which makes this idea perfect for a heavy card-giving occasion. (If you're a tosser like me, this idea may need to wait until this Valentine's Day is over...then you'll be one step ahead for next February 14th.)

Step 1: Collect Valentine's/love theme-cards and select one of them to use as a template. You may want to use a smaller rectangle - choosing a larger one may mean your template won't fit on the smaller cards. Unless you want to create several different sizes of triangles.

Step 2: Make your template. Tear the card in half along the crease mark. Like this:

Then, using the back half of the card (the one with the main message), fold it in half. Like this:

Next, using a ruler, draw a diagonal line from one corner to the other. Like this:

Cut along the diagonal, unfold, and...voila! your template.

Step 3: Cut out your pennant pieces. Using your template trace around the colorful front of the card and cut out. At this point, you may want to write on the back who the card was from, who the card was for, and the year. Also, you may want to play with the order of the pieces to get a pleasing pattern.

Step 4: String your pennant pieces together. Punch two holes at the top and thread string, ribbon or raffia through the holes. Holes small in diameter are better than larger ones unless you are using a thick material to string the pennants - you want to be able to slide the pennants along and adjust their position easily.

Step 5: Hang up on the day of the celebration and enjoy. Tuck away for the next Valentine's Day and add to it as you collect more cards.

Monday, January 23, 2012

abuzz with love (and photos from the weekend)

Unlike my as-of-late tendency to think of gift ideas in the week before the occasion, lately my mind has been buzzing with Valentine's Day ideas. Perhaps an answer to my prayer to be intentional and take my time over creating gifts. So I thought it would be fun to share these ideas over the next couple of weeks interspersed with my other posts. Mostly, I've been trying to brainstorm fun, yet practical ways to say "I love you" beyond the usual cards which are destined for the recycle or toss pile.

And in my shop, I'll be stocking some special Valentine's Day items in the coming week, Lord willing. I already have these hand-sized pit packs listed:


...and I'll be listing these cloth sacks soon:

And some pictures from the week which began and ended with sledding at one of our favorite spots. I'm having a time of it trying to get Ben to keep his mitts on....after I took this picture, he started dragging his hands in the snow as I pulled him on the sled, lost a mitt, but kept right on trailing his fingers until I noticed what he was up to!


Wednesday, December 21, 2011

on the wings of peace: a printable


In case you are looking for one last little something to give this Christmas and if, like me, the desire for peace within and without beats strong, then I hope you will enjoy this printable and craft idea.


To make the garland:
  • Visit my scribd page for the download and print. I suggest 2 copies.
  • Cut out the doves (the image was from the Microsoft Clip Gallery). Cut around the outer most edge - it will leave you with one side pure white as pictured above and one with the gray lines showing.
  • Punch two small holes in the doves' wings about 1" from the wing tip, or in the first ruffle of the wing
  • Thread the doves on the medium of your choice - I used raffia, but satin ribbon also would be pretty.

Individually, the doves also would make pretty gift tags or in a card and tucked in a small sack, they make a lovely gift...


Saturday, November 12, 2011

and the gift theme continues...

When I was preparing for a craft show back in October, I put together several packages of "fabric ribbon."

The idea came to me when, earlier this year, I helped with a clean up at a local beach. As I picked up the garbage I noticed many bits of plastic-type ribbon (the kind used to give the extra flourish in gift wrap). Since most of it was green & red, I guessed these remnants were from Christmas gifts. The ribbon-destined-for-the-garbage-dump didn't seem like a very honorable way to recognize Christ's birth.

That thought, combined with the ever-growing mountain of narrow fabric pieces from my sewing projects prompted me to put together these packages.

I finally listed these two items on my etsy shop today...just in time for the great gift-giving season. (However, these also are great for scrapbooks, homemade cards and other craft projects, as party decor (see this idea at KoJo Designs) and in the garden (a colorful way to tie up your tomatoes).

I also wanted to make them extra special by packaging them with recycled materials to fit with the theme. I decided to wrap the fabric ribbon around recycled cardboard boxes (e.g. from cereal) and glued on watercolor pictures the kids had done. The artwork of the birds and nest on the tags was done by me. :)


And a reminder that you can still save10% off all items in my shop through Wednesday, November 16, 2011. To redeem your coupon, please enter the following into the coupon code section: 3giftsthursday. It's an extra little gift for you. :)

Wednesday, October 19, 2011

ten years & a banner of love

Tomorrow marks 10 years that Dave and I have been married. How time has flown and yet it seems like it should be longer than only 10 years. Perhaps it has something to do with having four children in eight of those years...;)

*******
In honor of this decade milestone and the fact that I finally hung up this:
above our bed (it only took me seven months!), I have a printable and tutorial to share.

I came up with this idea after seeing the simple and beautiful creations of this artist on etsy. Since I worked on this back in February, I went with a heart and love theme and based it on the passage in 1 Corinthians 13 which describes the attributes of love using the NIV version of the Bible. (My aunt - and godmother - read it on our wedding day.)

To make your own "Banner of Love," follow these instructions:

1. To get the template and save you time, go to my page on scribd. However, if you wanted to use a different version of the Bible or change the font, it's easy enough to create your own version using Word. If you need help with this, just send me an email.

2. Print out the pages and cut out the hearts.

3. Using a hole punch, punch out two holes in the top of each heart.

4. Now string the hearts into a garland (just make sure you're doing them in the same order as the passage ;) ). I used raffia but you can use any type of material to string them. I had to use several raffia pieces - I just knotted them together and made sure the knot was behind a heart.

5. Find a place to string them where you'd like a reminder of love. I liked the simplicity of hanging them above our bed - a reminder that God's banner over us is love.

linking with:


*******

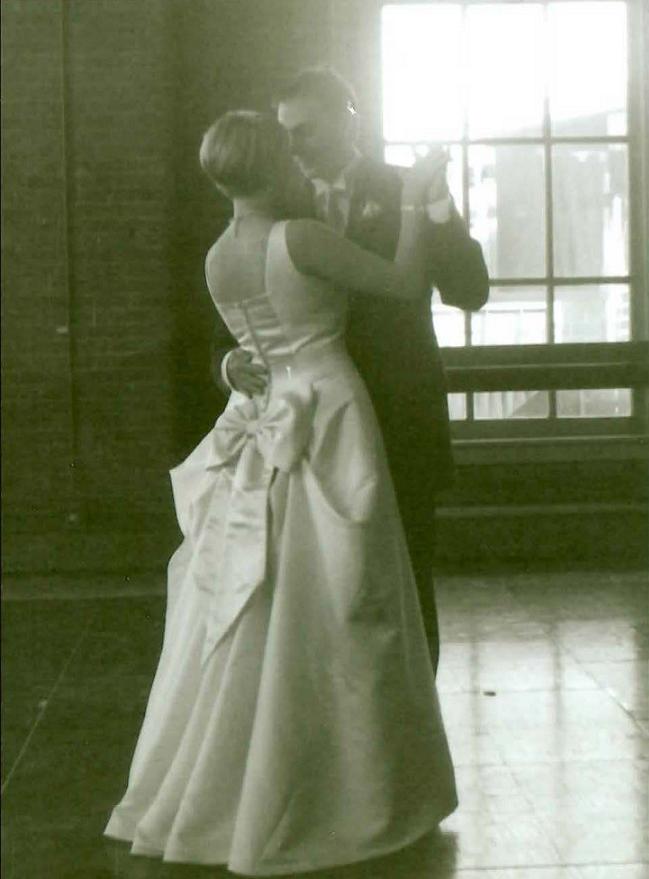
Wedding memory: My grandpa (the only one I knew as a child) had died in January of 2001. As a way to remember him and honor the long years of marriage celebrated by my grandparents, I wanted to have a bagpiper lead Dave and I down the aisle at the conclusion of the ceremony. My grandparents had done a similar thing when they got married in England during WWII while my grandpa was serving overseas. Bagpipers and wedding days are synonymous in my mind as a piper is prominently featured in one of their wedding pictures.

Somehow, there was a confusion in communication and we ended up having two pipers show up! And then, in all the wedding excitement, Dave forgot we were even having a piper at all and was rather startled when one began playing right behind us near the altar. I'm not sure being scared out of your wits is a great way to begin a marriage, but Dave has recovered nicely. :)

Tuesday, September 13, 2011

gift idea geared for a guy

Today is my Dad's birthday and every year I struggle to come up with creative, personal ideas for him (and my husband and other male family members when gift-giving is called for). After some serious thinking and praying here's what I came up with (we celebrated Sunday, so this won't be giving away any surprises ;)):


I call it the "Ticket to Ride" gift package (and could be adapted for any sport or theme).

Gift package details:
  • 1 container of my special trail mix recipe contained in a cracker jar I found at Target
  • 1 personalized white t-shirt intended for use on a bike ride*
  • 1 gift card to tie up the theme - the gift card is an invitation for my Dad to go on a bike ride with my husband and I
  • 1 galvanized metal container (garage sale find!) - I considered adding a ribbon or burlap wrapping but decided it was more appealing to have the contents visible


* To make the T-shirt, I bought a plain white one (at Target) and designed the message using MS Word. The bike graphic was from MS Office Clip Art. I printed the design on freezer paper (available online or in stores), and used an exacto knife to cut out the image (this was an idea I've come across on several blogs including Made and Finding My Feet). After applying the freezer paper to the T-shirt, I filled in the design with black fabric paint, let it dry, ironed the image to set the paint and voila!

Find some more great ideas at Kojo Designs Fun Friday Finds.

Tuesday, August 30, 2011

crafting like crazy

The past week I've been sewing up a storm to get ready for my very first craft show in October. I dedicated last week to pairing up fabrics for more women's, teens and girls reversible headbands.
 
Before we left on vacation, mid-August I excitedly worked on my very first esty custom order - a tablecloth, potholders, napkins, hand towel and napkin rings for a play kitchen. Once I get beyond the craft show, my plan is to create a "Kitchen Play" custom listing in my shop.

I love "painting" with fabrics - combining colors and patterns to create something beautiful and useful and am so thankful the Lord has given me this creative outlet.

Saturday, August 27, 2011

homeschooling and a how to

This week in homeschooling we got back into the swing of things...


After completely stressing about every detail of school last year and burning myself out by the end, this year, I'm leaning on the Lord to help me ease into things and enjoy the teaching moments He brings before us...like having Dave encourage the Brianna and Reese to do book reports and he even put together the book report form. I decided we needed a place to house these reports-to-be, which leads me to the "how to":

Creating Book Report Folders

What you'll need:


What to do:
Choose a picture of your child or an image of their choosing, then go picniking (in case you haven't encountered it before, picnik is a great photo editing site and is free, though it also has a monthly fee if you want premium features). Here are my originals:

Make any edits to your photo as needed (such as cropping or adjusting the light). Then click on the "create" tab. Pick the "effects" button and scroll down until you see the "pencil sketch" feature (it's part of the free package) and select the button. Adjust the radius and strength slide to get the best "like a coloring book" look to your picture - I found moving the radius slide to "5" worked best. Hit the "apply" button.

Next, select the "text" tab and add in your text. If you buy the premium feature, you'll have more fonts to choose from - I used the handwriting-type fonts available in the free version. The text always appears in white at first, so you'll need to adjust the color in the text properties pop-up box. (To create the strikethrough for Reese's picture, I went to the sticker tab, choose the geometric shapes button, selected the rectangle and adjusted it to create a thin black line.)

Save the photo (click the "save and share tab"). Before I printed, I inserted the photos into Publisher (you could use Word, too, or other similar programs) so I could adjust the final print size - if you print directly as a photo, you may be limited in your size selection, but check your photo print options on your computer).

Here are the final products:


I had Brianna and Reese color their pictures, then I pasted them to the front of their folders (I chose to do all the cutting and pasting, but this is something the kids could easily have done).

Since Dave wanted the kids to see where the books are published, I found some maps (world map here, US map here) and printed, cut out and pasted them to the backs of the folders.


We decided we'd like to reward Brie and Reese for the reading and reporting. So I created a book meter with starfish on every nine spaces (there are 36 spaces - one for every week in the typical school year). Each time they get to a starfish space, we will take them to Half-Price Books to buy something for their personal library.

Finally, we used the pockets inside the folder to store blank report forms so they're handy for the kids.

And that's it! My favorite part about this project is that Dave initiated it and got it underway - it's always lovely to be supported  :)